How to Install VirtualBox on Ubuntu 18.04 LTS
There are several different virtualization platform you can use on Ubuntu 18.04 Desktop. The best one is oracle VirtualBox because it is fully featured free and open source virtualization platform.
VirtualBox is a very popular hypervisor available for Windows, Linux and MacOS. For Ubuntu Virtualbox provides a .deb package which we can easily install from the Ubuntu software center.
Steps to install VirtualBox on Ubuntu 18.04:
- Download Oracle VM VirtualBox for Ubuntu 18.04.
- Install VirtualBox with software installer.
- Add yourself to the vboxusers admin group.
- Install Oracle VirtualBox Extension pack.
To download VirtualBox, Go to following URL virtualbox.org/wiki/Linux_Downloads and download the Ubuntu 18.04 (“Bionic”) AMD64 package.

The package is in DEB package format. Save the package to your computer and after the download is finished, right click on the deb file and select:”Open With Software Install”.
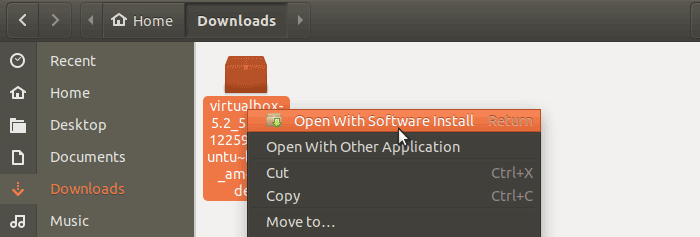
This will open the VirtualBox setup in Ubuntu Software center. Within the software center, click on the install button to install VirtualBox on Ubuntu 18.04.
Next, you need to add your user account to the vboxusers group.
usermod -aG vboxusers your_usernameIn the above command, replace the your_username with the actual username of the user account you use to login to your Ubuntu desktop.
VirtualBox installed on your system as software application and have both graphical user interface and a command line tool to manage virtual machines on your Ubuntu 18.04 system.
Install VirtualBox Extension pack
After we have installed VirtualBox, we should also install the Oracle VM VirtualBox Extension Pack. The Extension Pack enables USB 2.0 and 3.0 support, RDP, disk encryption, and several other features which are not available by default.
First download the Extension Pack at virtualbox.org/wiki/Downloads.

Click on the All supported platforms link, when prompted to save, select open with Oracle VM VirtualBox.
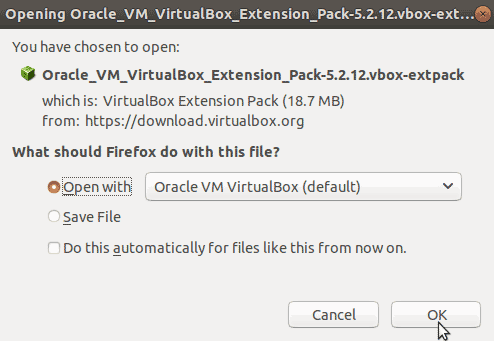
You will be asked for the final confirmation before installing the extension pack.
Install Windows 10 on Ubuntu VirtualBox
Now we have fully featured hypervisor installed on our Ubuntu desktop. It is time to create a new virtual machine and install an operating system on it. I am going to create windows 10 virtual machine, but you can install any operating system you want.
- Open the VirtualBox and click on the New button.
- Name the Virtual machine and select the operating system you want to install.
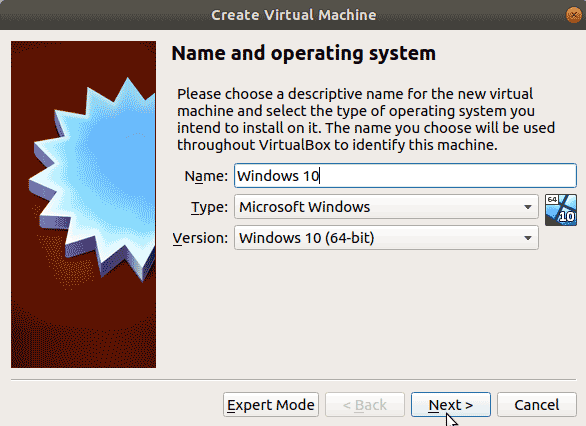
- Select the maximum amount of memory size to be allocated to the VM.
- In the next screen, choose:”Create a virtual hard disk now”.
- Select VDI (Virtualbox Disk Image) as hard disk file type and click next.
- On the next screen, keep storage Dynamically allocated and click next.
- From the next screen, name the virtual hard disk and select the maximum size of the hard disk.
- One the setup is finished, right click on the VM and click Settings.
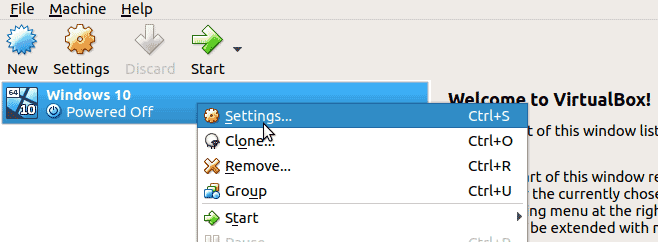
- Under the Storage Devices click on the optical drive icon, then select your DVD drive or the ISO image of the OS (depends on the installation media you are going to use).

- From the VirtualBox manager, select the VM and click on the start button to start the guest operating system.
When the virtual machine starts for the first time, you will get the Windows 10 installation wizard. From there everything is similar to what you do in a physical computer.
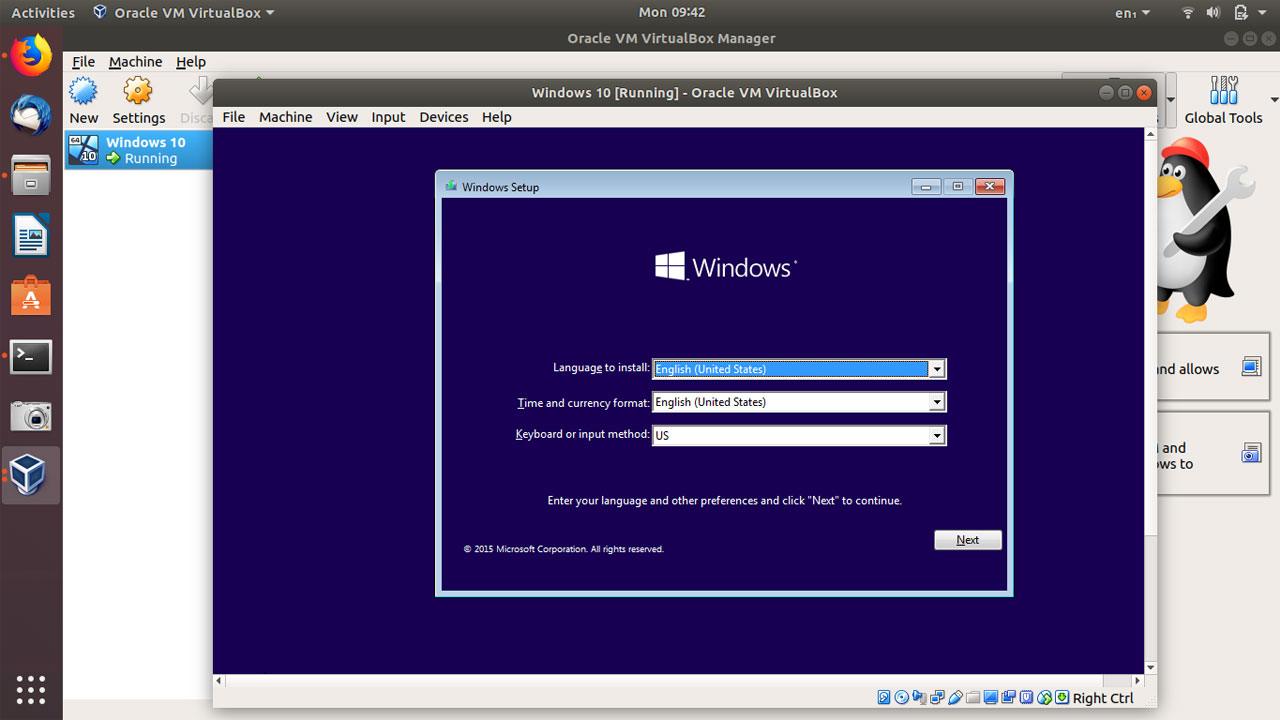
Just like that you can create many virtual machines as you want and run simultaneously on a Single computer.